


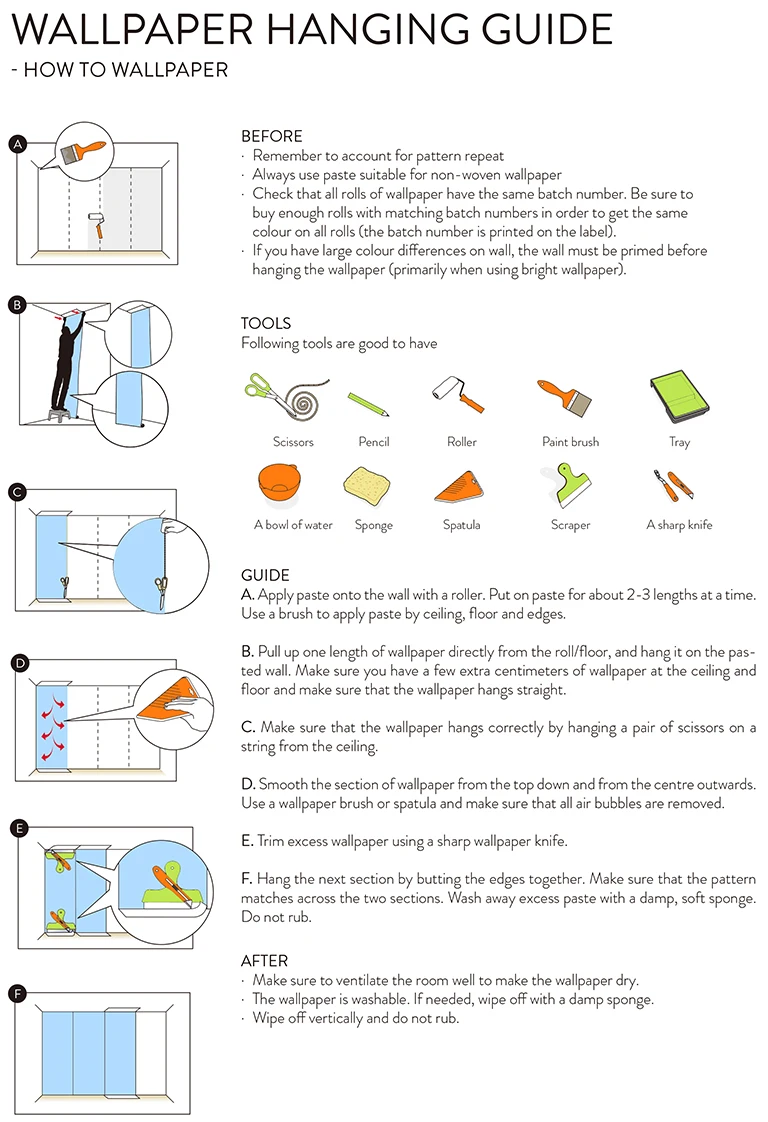
How to apply our wallpaper?
STEP 1: Prepare the wall surface
-
Your wall must be completely flat, clean and dry. Levels rough surfaces, rough, holes and uneven spots.
-
Your wall should be a uniform color. If not, you may notice differences in color on your wall once installed. If your wall has multiple colors, we recommend that you paint again.
-
Make a vertical line with a plumb line on the left edge of the area you want to cover with the mural. If you have a plumb, one can make your own by tying a heavy object on the end of a rope. This line is very important because it is the guide to start placing your mural.
STEP 2: Prepare the wallpaper
-
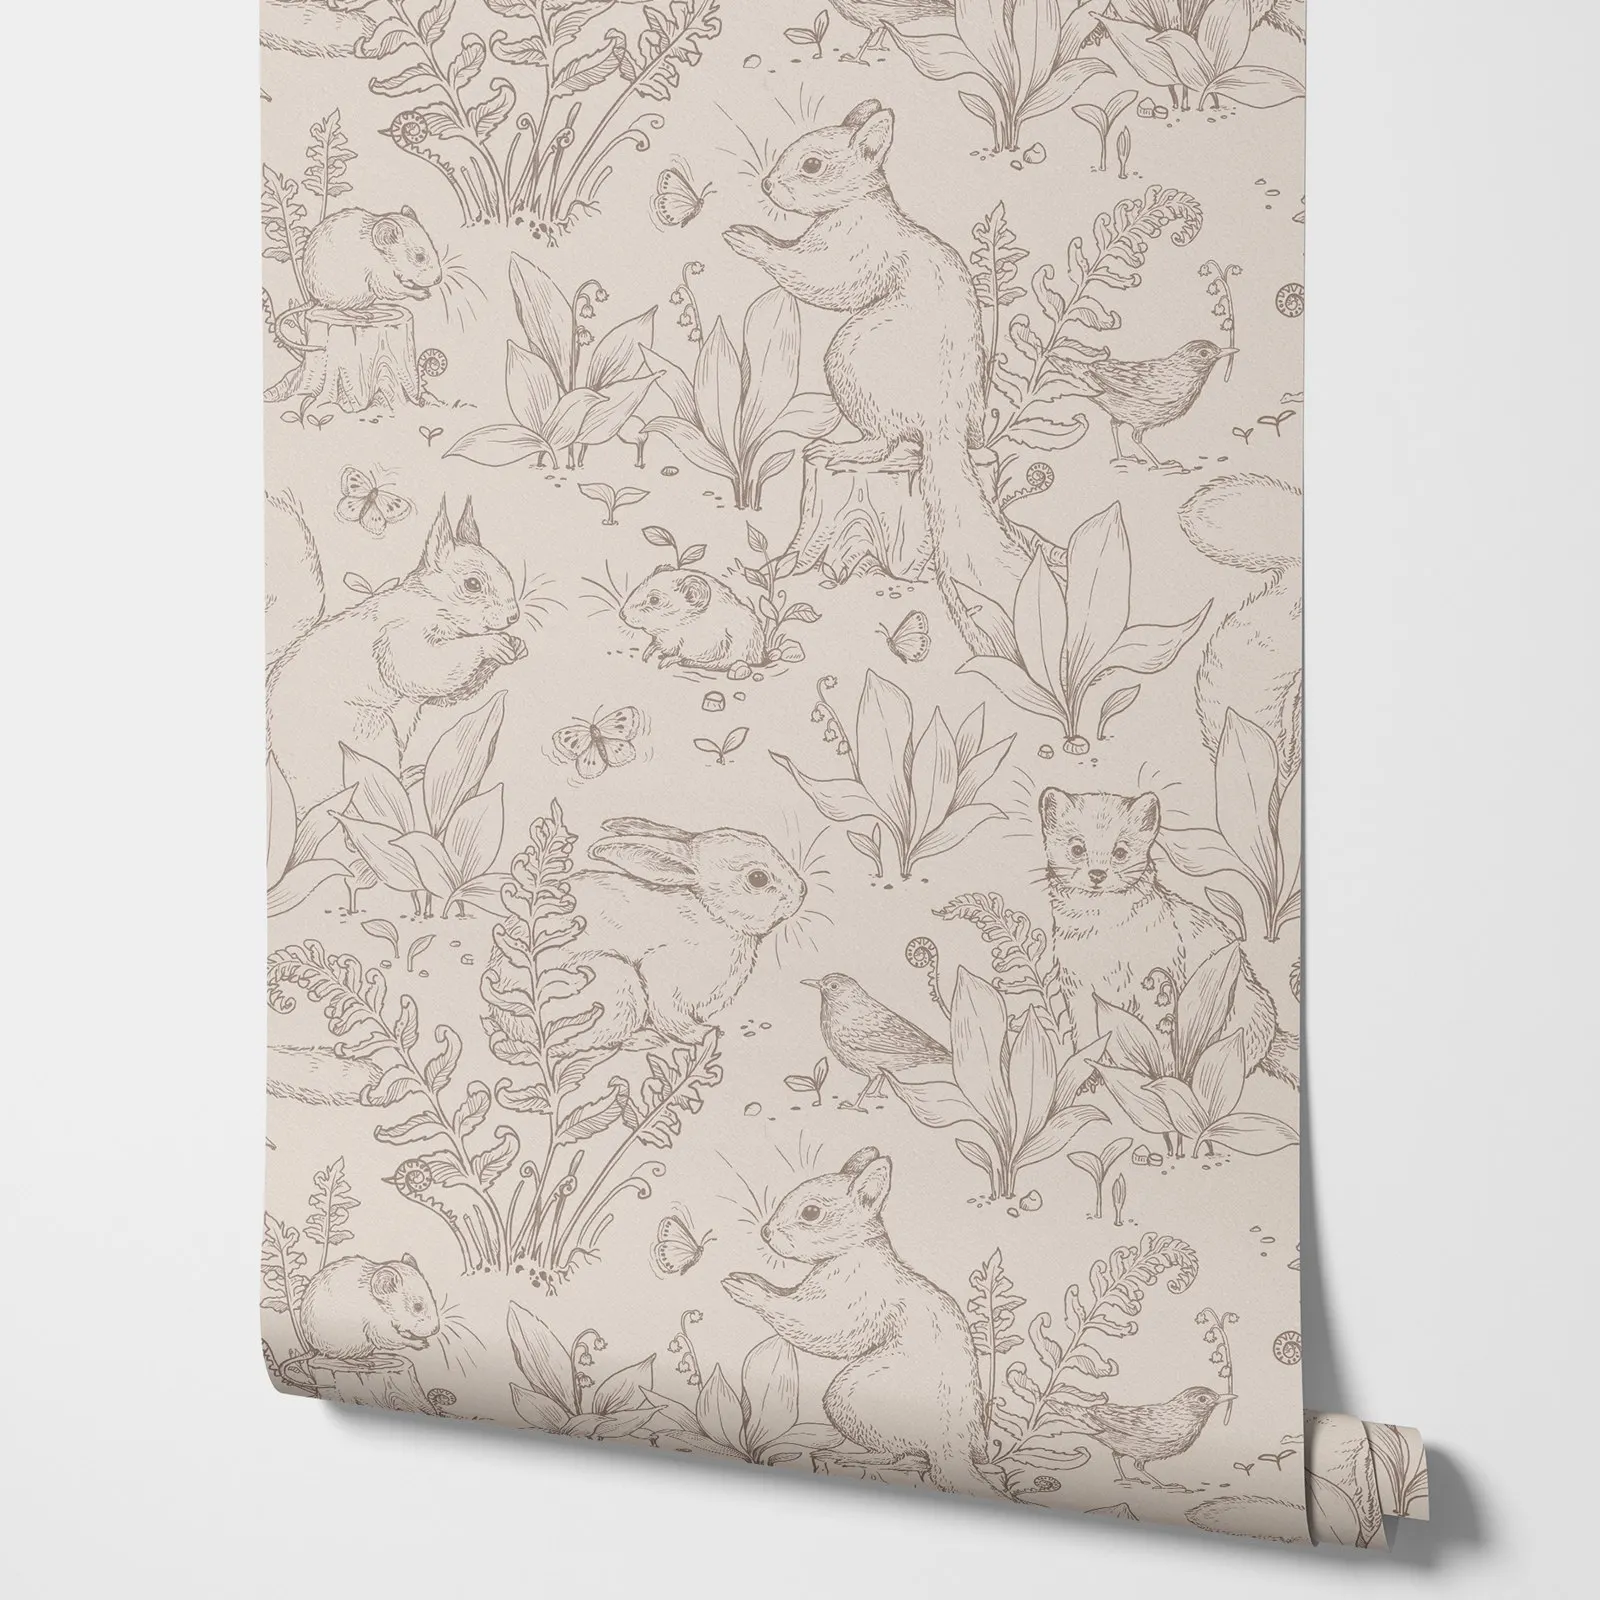
The wallpaper panels are made with a width of 50 cm(19.7"). Panels are received printed continuously on a roll and numbered at the top.
-
Cut independent panels and do a preview on the ground following the numerical order from left to right.
-
Measure with a meter the height of your wall. If it’s less than the photomural, you must cut it to fit properly. Do it while you have it on the floor but leave a margin of an inch to correct any differences in level on the wall.
STEP 3: Prepare the glue
-
You may buy the glue from your supermarket, confirm it’s for non-woven wallpaper use.
-
Prepare the glue following the instructions on the bag of the glue you bought. Do it slowly. So you will obtain a uniform mixture and without bubbles.
STEP 4: Attach the paper to the wall
-
Applying glue on the wall evenly using a brush or a paint roller. Start distributing from the line you marked as a guide to the plummet. Don’t paste the entire wall, do it only in the area that will cover the first panel on the left, leaving a few inches outside the right.
-
Apply the first panel of the mural on the wall starting at the top left. Check that is aligned with the guide.
-
Presses against the paper with a dry roller or sponge to remove any air bubbles.
-
Place the following panels in the same way in numerical order. The panels must not be mounted on each other but are set on edge.
-
Clean the excess glue with a damp sponge.
STEP 5: Finishing
-
With the help of a ruler and a cutter, adjust the sides and the top and bottom of the wall if necessary.
-
Let dry 24 hours; you will get a perfect final result
Come applicare la nostra carta da parati?
STEP 1: Prepara la superficie del muro
Il tuo muro deve essere completamente piatto, pulito e asciutto.Livelli superfici grezze, grezze, fori e macchie irregolari.
Il tuo muro dovrebbe essere un colore uniforme.Se non, potrebbe notare le differenze di colore nel tuo muro è stato installato una volta.Se il tuo muro ha più colori, raccontiamo che ti verniciato di nuovo.
Fai una linea verticale con una linea idraulica sul bordo sinistro dell’area che vuoi coprire con il murale.Se hai un prugno, uno può farti la tua legare un oggetto pesante sulla fine di una corda.Questa linea è molto importante perché è la guida per iniziare il posizionamento del tuo murale.
STEP 2: Prepara la carta da parati
I pannelli della carta da parati sono realizzati con una larghezza di 50 cm (1,19,7″).I pannelli sono ricevuti stampati continuamente su un rotolo e numerati nella parte superiore.
Tagliare pannelli indipendenti e fare una previa sul terreno seguendo l’ordine numerico da sinistra a destra.
Misura con un metro dell’altezza del muro.Se è inferiore alla fotomurale, devi tagliare adattarsi correttamente.Fai mentre sei il pavimento ma lascia un margine di una pollice per correggere qualsiasi differenza nel livello sul muro.
STEP 3: Prepara la colla
Puoi acquistare la colla dal tuo supermercato, conferma è per l’uso di carta da parati non tessuta.
Prepara la colla seguendo le istruzioni sulla busta della colla hai acquistate.Fai lentamente.Quindi obporterà una miscela uniforme e senza bolle.
STEP 4: Allegato il carta al muro
Applicazione di colla sul muro utilizzando anche un pennello o un rullo di vernice.Inizia distribuendo dalla linea che hai marchi come guida all’impugnatura.Non incolpare tutto il muro, fai solo nell’area che copronterà il primo pannello a sinistra, lasciando pochi pollici all’esterno della destra.
Applicare il primo pannello del murale sul muro a partire da parte superiore a sinistra.Controlla che è allineato con la guida.
Presse contro la carta con un rullo asciutto o una spugna per rimuovere qualsiasi bolla d’aria.
Effettua i seguenti pannelli nello stesso modo nell’ordine numerico.I pannelli non devono essere montati per ciascuno altro ma sono incastonati sul bordo.
Pulisci la colla in eccesso con una spugna umida.
PASSO 5: Finitura
Con l’aiuto di una righello e una taglierina, regola le sponde e la parte superiore e inferiore del muro se necessario.
Lascia asciugare 24 ore; riceverai un risultato finale perfetto


D***i -
Come la foto, lo consiglio vivamente.